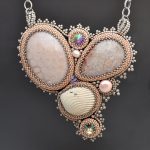
If you’re starting in the jewelry making sector, or you’re trying to find something brand-new and also a little various to attempt your hand at, why not exercise making decline jewelry? Not just are they wonderfully straightforward to produce, yet decrease jewelry is a wonderful method to display your much-loved grains of all forms and also colorways.

We’ve developed a detailed overview for those of you questioning exactly how to make basic decrease jewelry, from picking your grains to utilizing your jewelry making devices.
Just how to make decline jewelry for novices
Making a decrease in jewelry requires not to be a difficult job. All you require is a suggestion of just how you desire your decrease jewelry to look, and also the adhering to devices as well as products:
- Beads of selection
- Headpins or endpins
- Earring hook cords
- Pliers
- Cutters
Tip One: Plan your grain layout
If you’re questioning just how to make decrease jewelry with grains, it’s crucial that you intend your style prior to you begin including your grains to your pins. You might pick a basic solitary grain, or perhaps a pile of various dimensions as well as colors. You can try out various choices prior to you start, yet ensure you do not occupy greater than two-thirds of the pin size, or else, you will not have the ability to produce pin loopholes properly (even more of that symphonious 4).
Tip Two: String your grains
Beginning with the lower grain, string your grains onto your headpin or endpin very carefully. You might not like your style once it’s strung onto the pin, yet there’s no reason you can not get rid of the grains as well as begin once again.
Relying on the size of your decrease jewelry, you might wish to try out various pins or jewelry articles. Search our choice of jewelry pins on the internet as well as begin making decline jewelry for your collection.
Tip Three: Bend your pin
As soon as you’re delighted with your grain style, grasp the pin simply over the leading grain and also, utilizing your thumb, meticulously flex the pin flat right into a 90-degree angle. Make sure when doing this, as you do not wish to trigger unneeded damages to your pin or grains.
Tip Four: Loop your pin
Currently, it’s time to develop an attachment loophole. This can be rather challenging, specifically if you’re making a smaller sized set of decrease jewelry, so take your time as well as do not use excessive stress to your pins.
Taking your pliers, carefully grasp the pin over the 90-degree bend. As you hold, draw the determine around the completion of your pliers with your thumb as well as first finger, making sure not to flex it right into any type of sharp angles as you do so. As you draw the pin, turn your pliers clockwise. After that draw completion of the pin back around the loophole to secure.
Our collection of jewelry pliers is suitable for aiding you to make the ideal set of decrease jewelry. Surf our round nose pliers for convenience when developing your pin loopholes.
Tip Five: Tidy up your pin loopholes
You might locate that there’s an excess cord standing out after you’ve produced your pin loopholes. Take your jewelry cutters as well as delicately clip away the extra, seeing to it the loopholes stay shapely.
Tip Six: Attach your jewelry to your hook cords
Whichever design of hook cords you’ve chosen, it’s currently time to connect your handmade pins to the hook cord loopholes. You’ve basically produced a dive ring when knotting your headpin or endpin, so utilizing your pliers, thoroughly flex the loophole open, attach around the hook cord loophole and also press it shut. Treat this action with treatment, as this is the last action and also you do not wish to harm your style.
There you have it– 6 basic actions to making decline jewelry. What layouts will you produce? As soon as you’ve developed a couple of sets, you can reproduce these actions and also change up the sizes and also grain mixes.